Setting up Cura has been briefly covered in my previous post but here I'll go into more detail, the next post will cover which settings can possibly produce higher quality prints
Cura step by step...
Make sure you've downloaded the correct version of Cura (15.02.1) or 15.4 also works so either one can be installed https://ultimaker.com/en/products/cura-software/list and the config file off 101hero the official download pageOnce you have installed Cura go to File --> Open Profile and choose the 101hero provided config file. It needs to be unzipped Cura wants a .ini file


Click on Machine -->Add New Machine

Click Next --> Choose Other


Click Next and fill in as below:

Click Finish and go back to Machine Settings and change the build area to circular and change the comm port to the correct board rate you can find it in your computer's system settings and baudrate to 115200

You need to be aware that the machine settings of width 105 and length 105 set the diameter of the round virtual print bed in Cura, but the effective print size of the 101Hero is only about 100mm or so. This means that wide objects that fit on the virtual print bed may not actually print properly.
Basic settings tab:

Advanced settings tab:
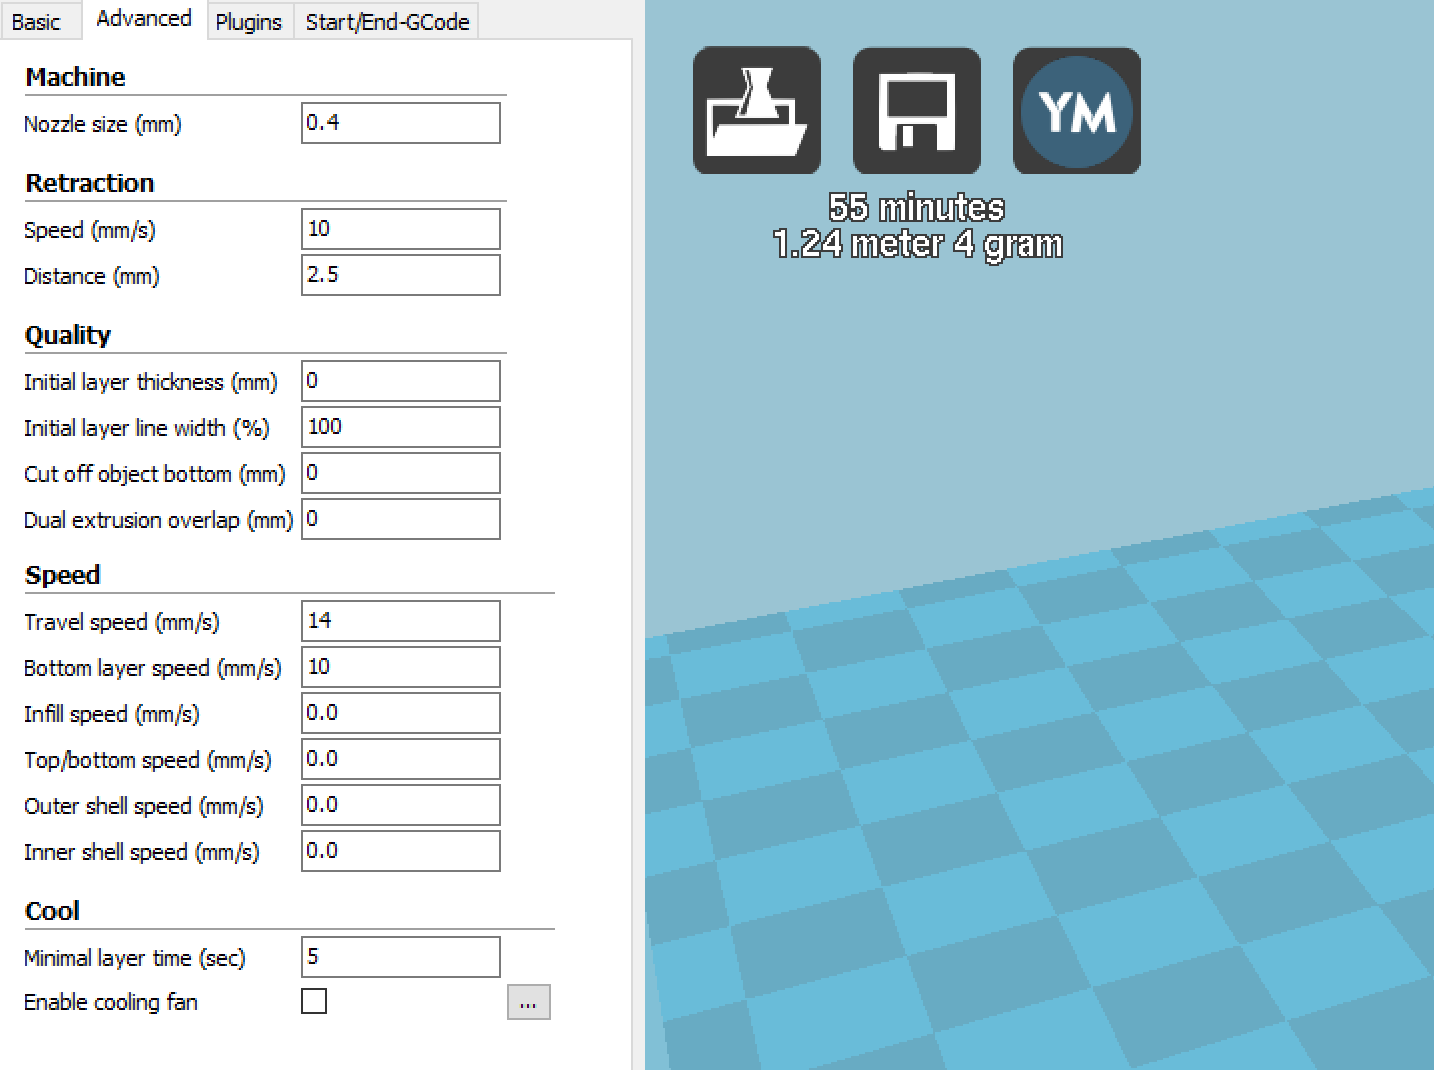
I have not made any changes to Plugins or Start/End GCode
An additional change you may want to make is to configure the printer interface from basic to pronterface - this gives you some additional information and controls.
Go to File Preferences

Now change the interface to Pronterface UI

That's it now you can load a model from Thingiverse and print over USB or save it to SD and print

No comments:
Post a Comment